IN GENERAL
Fast Track From Final Cut Pro to DVD SP
Quick Menu From Photoshop to DVD SP
MENUS
Using Motion to Create
Animated Backgrounds (FADE IN )
Using DVD SP Assets From Templates
Auto Assigning Buttons/
More Button Creation-Mapping
Semi/Pseudo Animated Rollovers Sort Of
TRACKS
STORIES
Scriptless Play All/Scene Selection
SCRIPTS
Using Scripts For Preferences (Audio Selection)
| DVDSTEPBYSTEP.COM / GENERAL / FAST TRACK OVER VIEW |
Sometimes markers can be a bear ("Hey my markers did not show up in DVD SP!!!") The movie shows a workaround for this problem, and also provides a quick overview of workflow from Final Cut to Compressor to DVD SP. Before looking at the movie, the following outlines what you will see - it will help in the event some of the screenshots are not clear.
OVERVIEW
I had made a fancy movie in iMovie, "Bouncer" (numbers appearing on the screen and moving), then exported it as a DV. Afterwards I bought it into Final Cut Pro, where this project starts.
In Final Cut Pro I added chapter markers, then exported the movie (you will see the details.) Then the next section shows the Final Cut Pro movie in Compressor already, from which point I show the settings and submits it for encoding. The last section is DVD SP (the Bouncer Assets are in DVD SP) and it goes from there
DETAILS
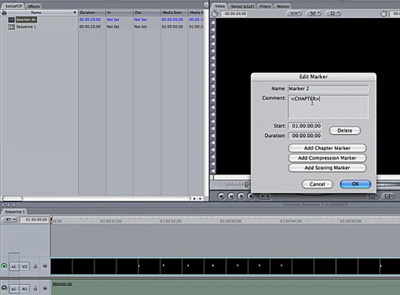
1.) Make the movie in FCP and place markers where you would like them by Double Pressing "M" key (to get the dialog box below) and make sure to press "ADD CHAPTER MARKER" in the Dialog box.
2.) Export the entire movie from the FCP to an umpcompressed movie with markers


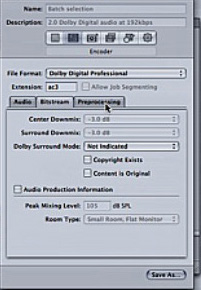
4.) Compress the FCP movie from FCP project by using Compressor (Note the settings for A.Pack/Dolby) with the general ideas as follows - A data rate of 160 or 192 is usually good, you should set Dialog Normalization to -31 (first screen shot on left), preprocessing to none and dechecking Copyright Exists and Content is Original also helps prevent glitches (middle shot) and no compression and selections not checked as in shot on the right.


5.) Launch DVD SP and press F3 Key to see the same layout. Drag the exported movie into DVD SP. Drag to track, the markers will show up.
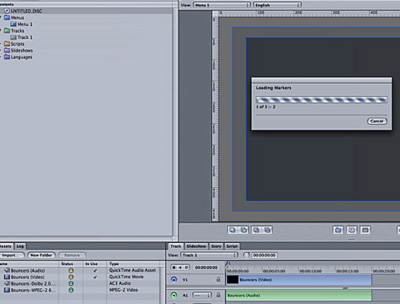

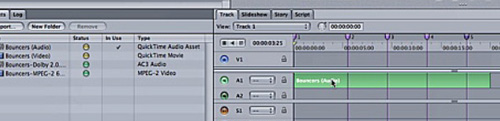
6.) Delete the item from the track in the track without removing the markers and replace with encoded assets (Note the original when imported is the QuickTime Assets and the second picture it is the encoded assets, notice how the "in use" check marks change.)

6.) Set Up Menu with a couple of buttons
7.) Make a Track
8.) Set up first play, look at ways of setting up jumps, etc.
The movie showing this is here (RUNNING TIME 4:50) and take a look at the Stories and Jumps movie for some more details. In under 5 minutes between both movies and reading this, you should be on your way.