IN GENERAL
Fast Track From Final Cut Pro to DVD SP
Quick Menu From Photoshop to DVD SP
MENUS
Using Motion to Create
Animated Backgrounds (FADE IN )
Using DVD SP Assets From Templates
Auto Assigning Buttons/
More Button Creation-Mapping
Semi/Pseudo Animated Rollovers Sort Of
TRACKS
STORIES
Scriptless Play All/Scene Selection
SCRIPTS
Using Scripts For Preferences (Audio Selection)
| DVDSTEPBYSTEP.COM / MOTION |
1.) Start a new NTSC Project in Motion

2.) Show the timeline in Motion

3.) From the library palette go to shapes
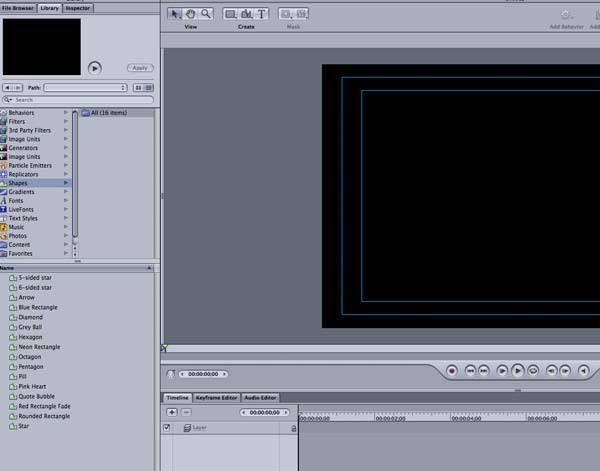
4.) Use the gray ball and place on the timeline

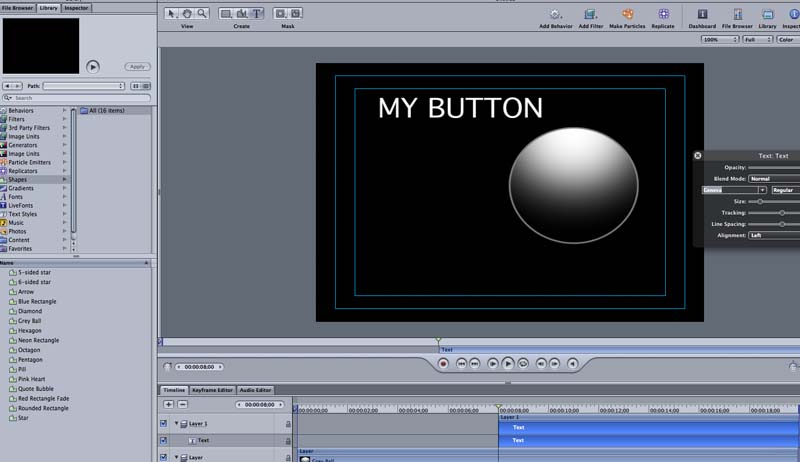
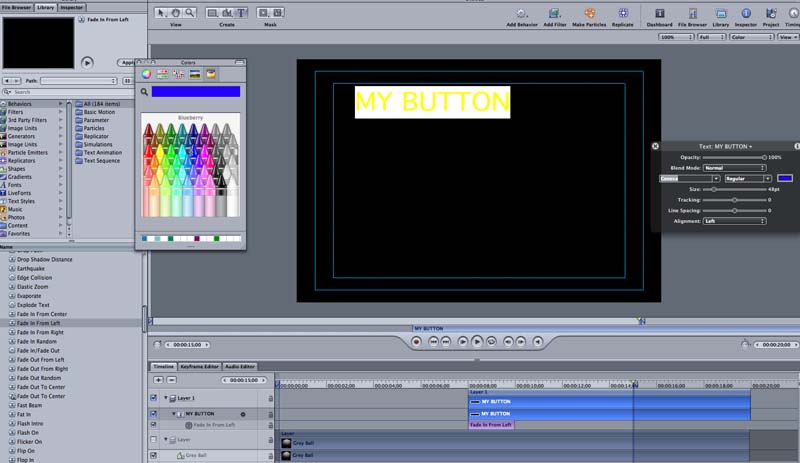
5.)Press record (the button becomes red) to make animation

6.)Drag the play head to about 10 seconds (see where inverse yellow triangle is on the timeline right above the gray ball track is in blue on the bottom of this picture) then drag the gray ball in the viewer and slide to the right. The red line indicates the motion path.

7.)Create a new layer

8.) Use the text tool to write "MY Button" in the new layer. Note that the left edge of the text starts at about 8 seconds where the gray ball has almost finished its cycle
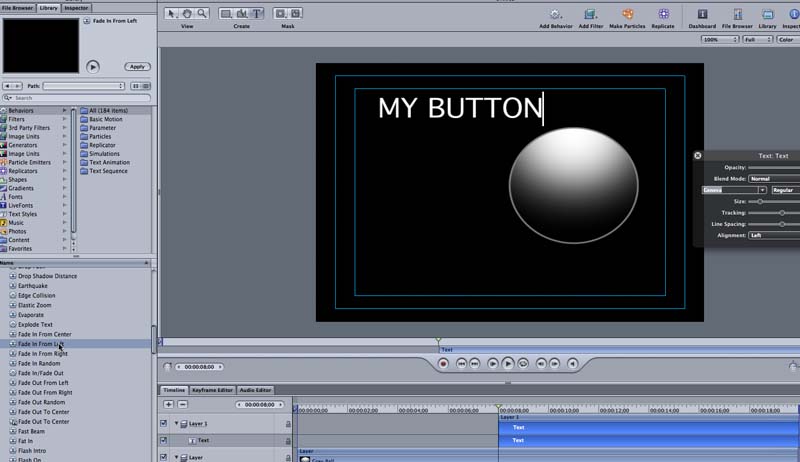
9.) From the library/behaviors, drag fade in from left onto the MY BUTTON text
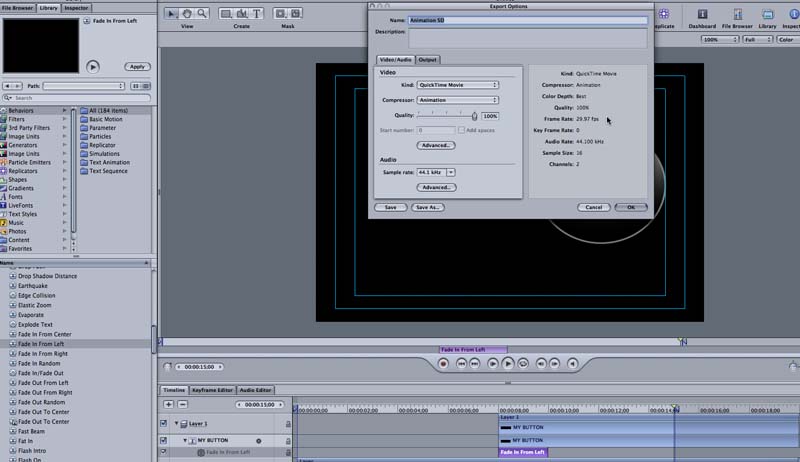
10.) Export the animation

11.) Note the export settings, particularly the second tab (output) 720 x 480 ALSO NOTE: This exported movie should then be compressed to an m2v. In the project files it is Untitled.m2v and I refer to it as Untitled.m2v later.

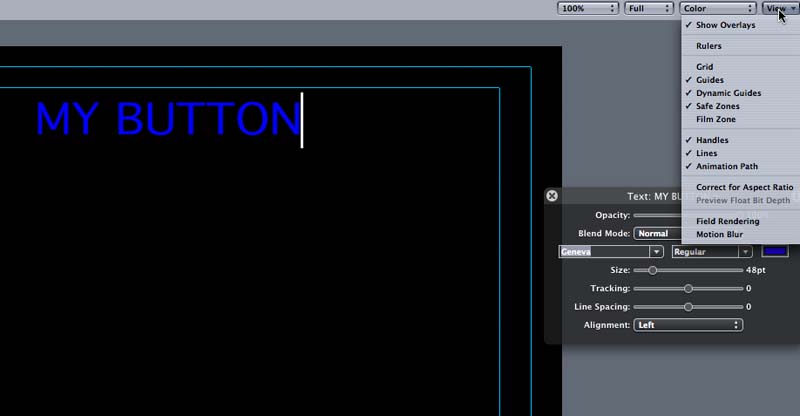
11.)Hide layer 1 then change color of the text to blue
>


12.)Note that settings should not be set (checked) for correct for aspect ratio. Then export as a still image, note the settings. In the project files it is Untitled.pct and I refer to it as Untitled.pct later.


13.)Open up DVD SP, press F3 key to get the following set up and bring Unttlted.m2v and Untitled.pct into the project

14.)The rest of the action occurs in the inspector so the images will focus there. Set the background for the menu to the Untitled.m2v

15.)Set the loop point to 10 seconds (where the text MY BUTTON is full faded in) by dragging the slider shown
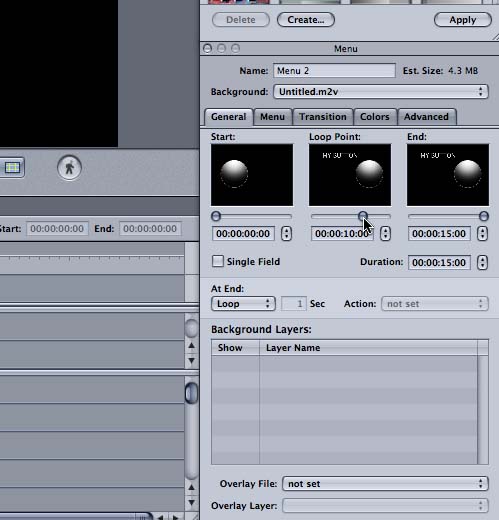
16.)Set the overlay for the menu to Untitled.pct

17.)Create a button
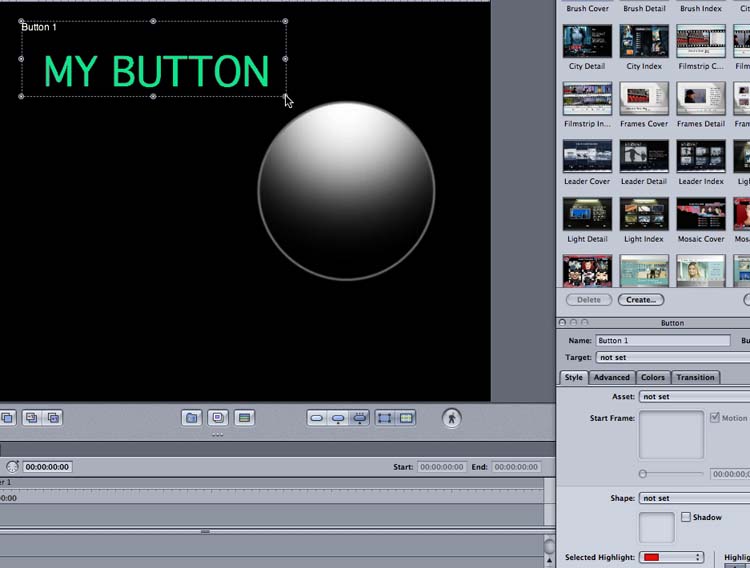
18.) Then Map the colors using Advanced Selection. Note that we are mapping blue right now since we made the text in Blue. You can also map Red, Black and White. In the example i made I just used blue for the overlay colors (Step 11 above). You could have also used Grayscale and mapped using that. In the image below, the blue is being mapped so that when the button is selected it will be Yellow with a Value of 7 (about half of the total color saturation which could be applied)
